.png)
In the fast-paced world of cryptocurrency, the ability to move assets securely and efficiently is crucial. For Binance users, one of the leading cryptocurrency exchanges, transferring Tether (USDT) to another wallet is a common task that, while simple, requires careful attention to detail.
This guide provides a step-by-step walkthrough for Android users, ensuring that even those new to digital currencies can execute transfers with confidence.
From selecting the correct network to confirming transactions, we’ll cover all the essential steps to move your USDT safely from your Binance account to another wallet.
Dig in!
Sending USDT to another wallet using the Binance Android Lite
To transfer USDT from Binance to another wallet in the Android Lite interface, follow the steps below:

Step 1: Prepare Your Wallets
- Open both your sending and receiving wallet apps. Ensure USDT is enabled within your receiving wallet.
- Locate your USDT balance in the sending wallet (Binance).

Step 2: Copy the Receiving Address
- On your receiving wallet app, locate the USDT address and copy it entirely. This address acts like your bank account number, so ensure you copy it accurately.
Step 3: Initiate Withdrawal on Binance
- Open the Binance app and tap “Wallet”. This will take you to your Binance wallet overview.
- Select “Spot” and find “Tether (USDT)“. Here, you’ll see your USDT holdings within the Binance Spot wallet.
- Tap “Withdraw” to initiate the USDT transfer process.
Step 4: Complete the Withdrawal process
- Paste the copied USDT address into the “Recipient Address” field. Double-check to ensure you’ve copied and pasted the address correctly.
- Next, select the appropriate network. This is an important step! Choose the same network that your receiving wallet supports for USDT. Common options include BEP20, ERC20, etc. Selecting an incompatible network can result in lost funds.
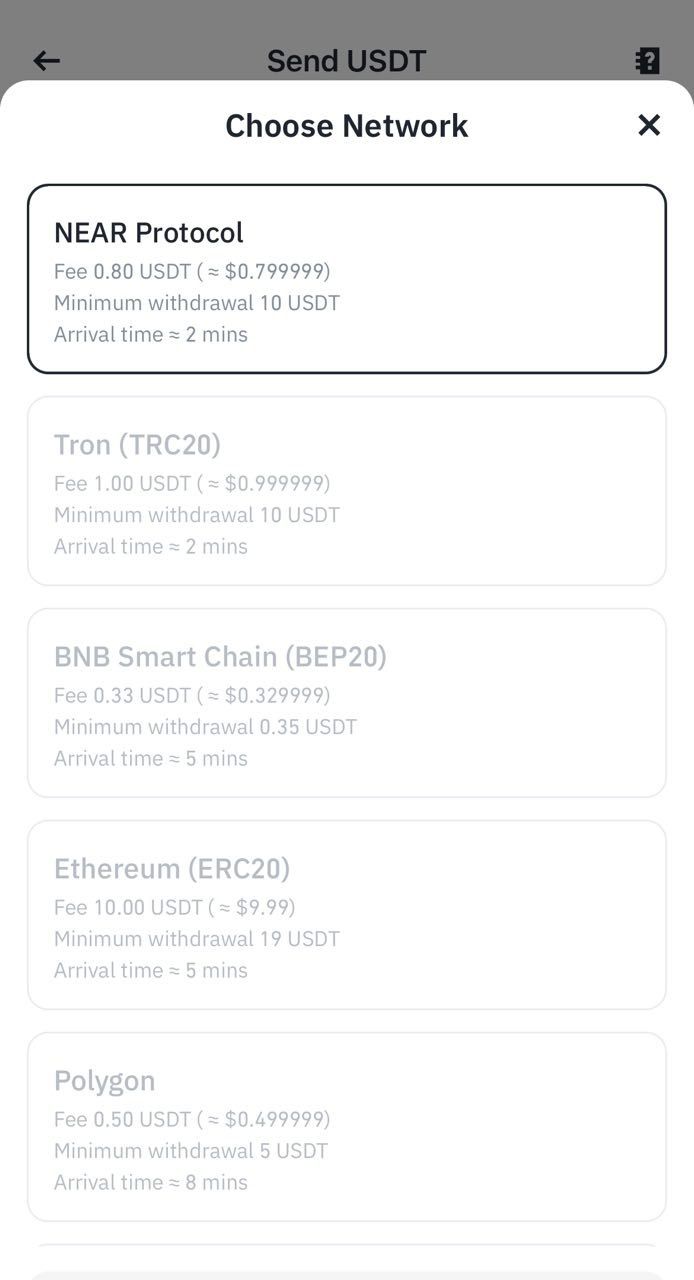
- Enter the amount of USDT you wish to transfer and review the withdrawal details carefully before confirming. This includes the recipient address, network selection, and transfer amount.
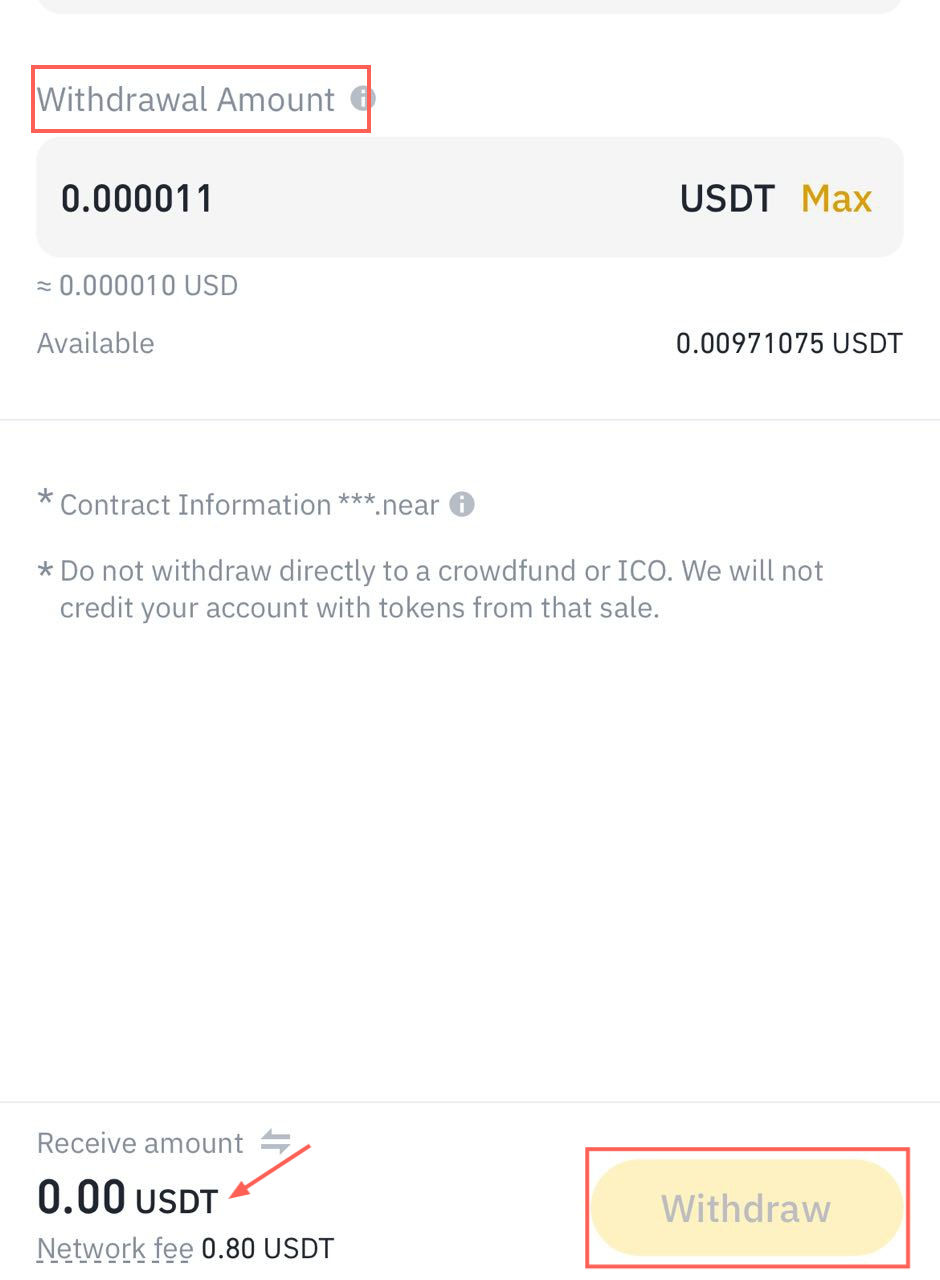
Step 5: Verifying and Finalizing the Transaction
- Complete the 2FA verification via authentication code or email verification.
- Tap “Withdraw” to finalize the transaction. Once you’ve confirmed everything and completed 2FA, proceed with the withdrawal.
Step 6: Confirm transaction
- You can track the transaction progress within your Binance app. The app will usually display the status of your USDT transfer. Once complete, verify the USDT balance in your receiving wallet app. It might take some time for the transfer to be reflected in your receiving wallet, depending on the chosen network.
How to Send USDT to another wallet using the Binance Android Pro
The steps for transferring USDT using Binance Pro are very similar to the Lite interface.

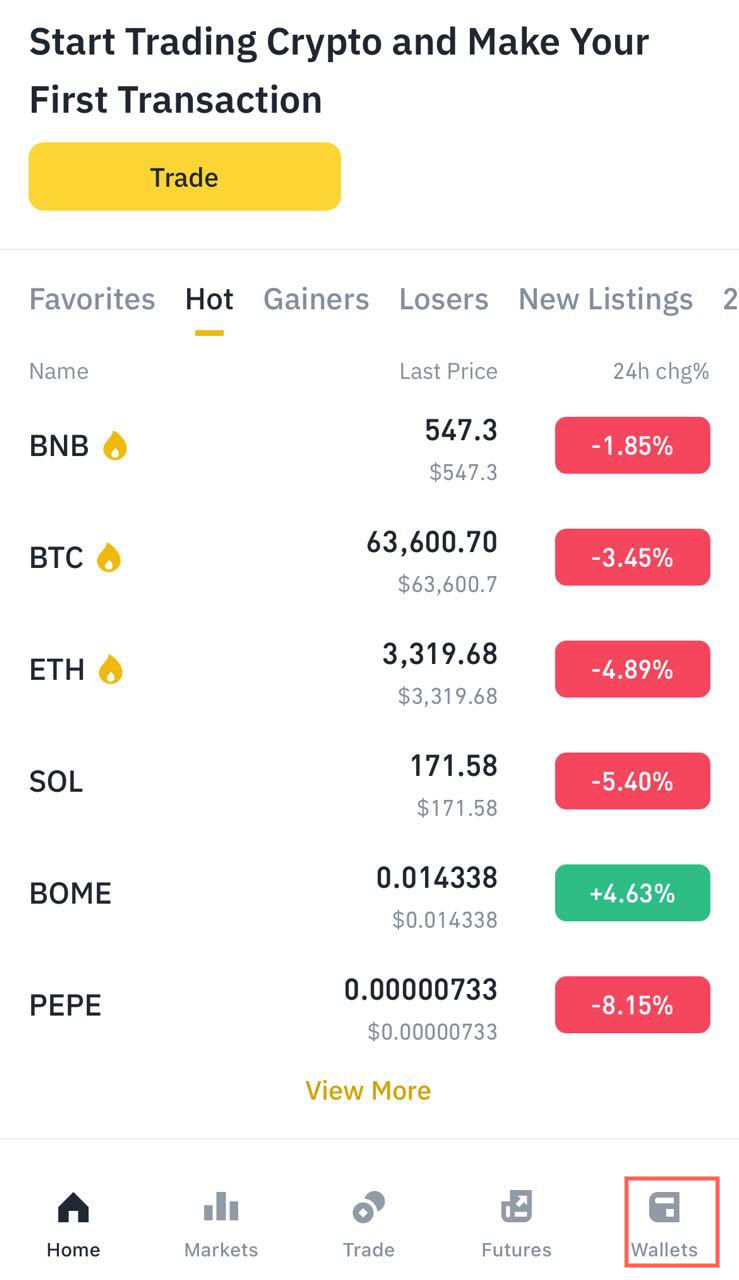
On the Binance home page, tap on the Wallets icon and switch to the [Spot] tab.
Step 2: Withdraw USDT
From the Spot tab, click on [Withdraw], then search for the Tether USDT coin. You will see how much USDT you have left.

When you tap on the selected coin, a popup will give you two withdrawal prompts. Select the [Send via Crypto Network] option.

Step 3: Enter the amount of USDT
Type in the amount of USDT you want to withdraw.
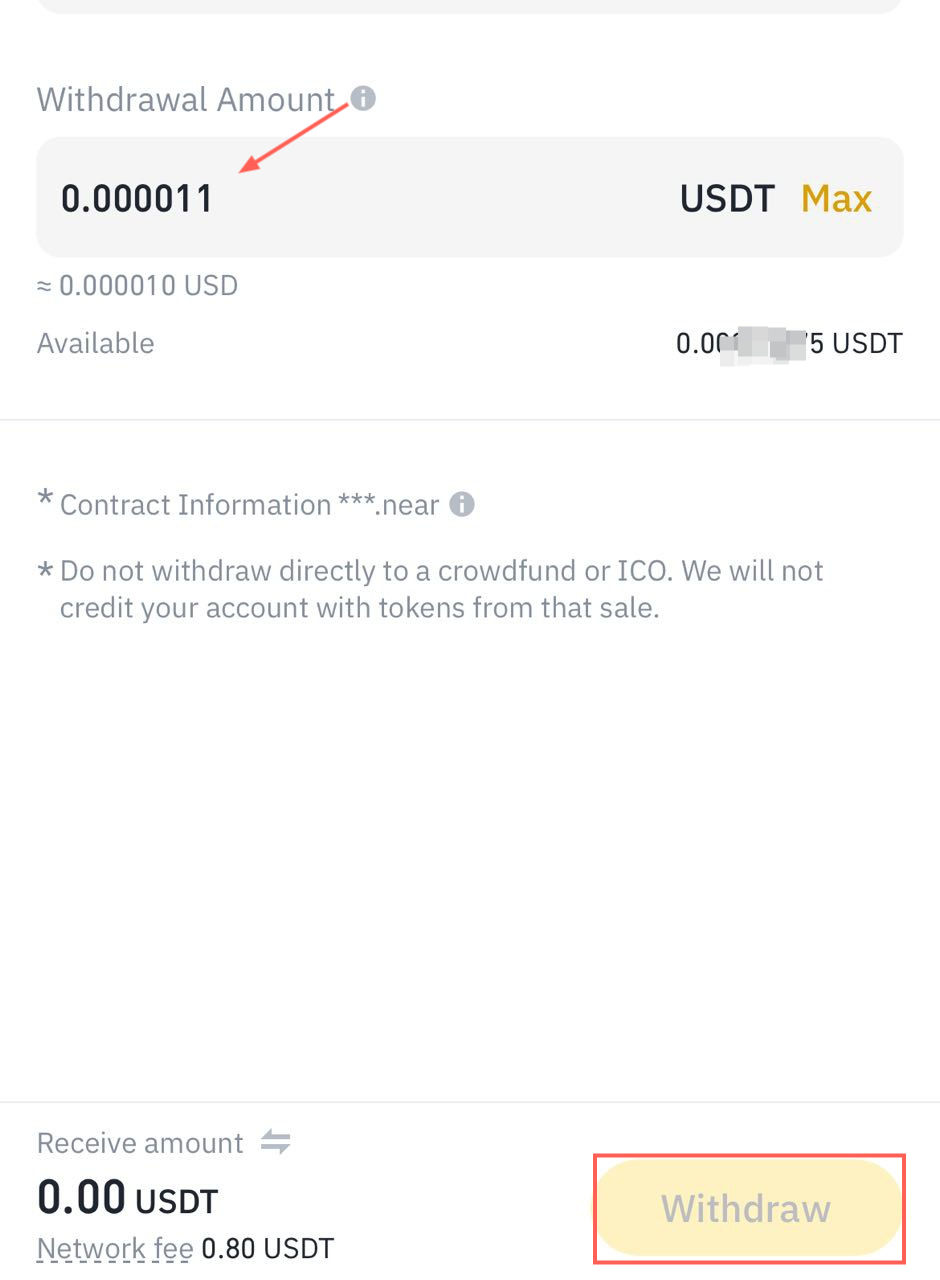
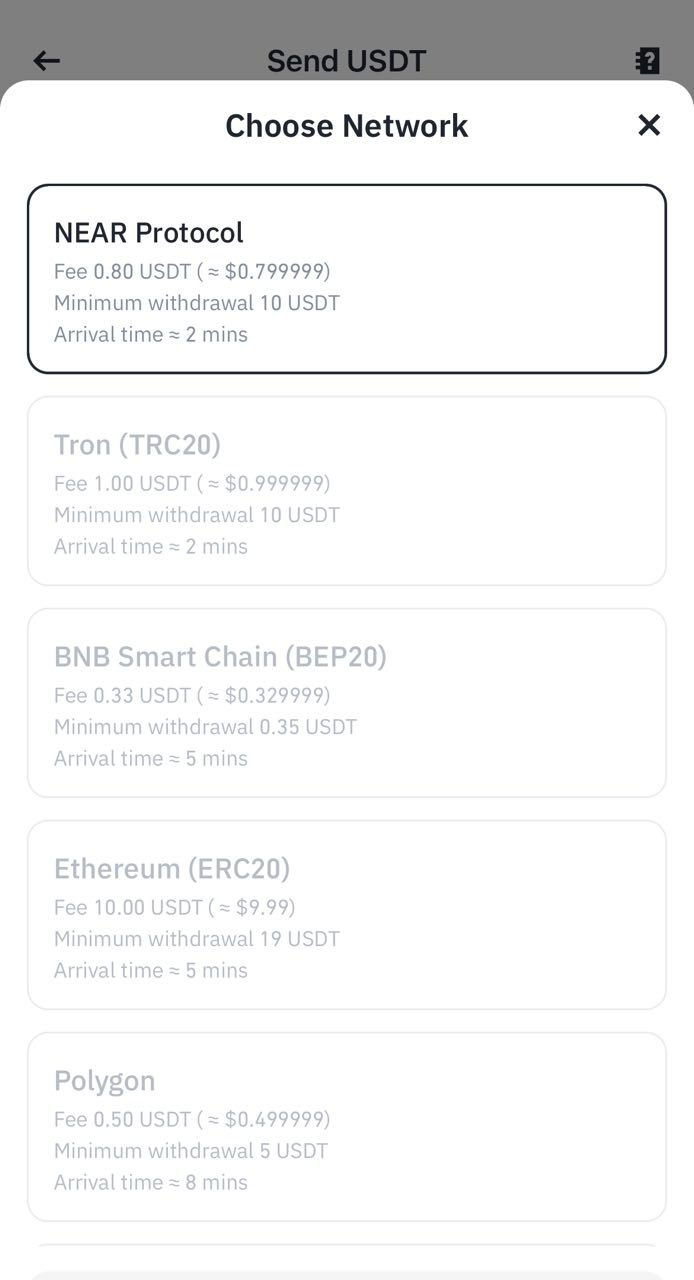
Note: Make sure to confirm that the receiving wallet is compatible with the network you selected as Binance will automatically match the wallet address you add to the corresponding network.
Step 4: Send USDT to the wallet
Proceed to hit withdraw. Depending on the two-factor authentication you have in place, you will be asked to enter the authentication code and possibly an email verification.
Complete the 2FA verification process and click [Submit] to complete the transaction.
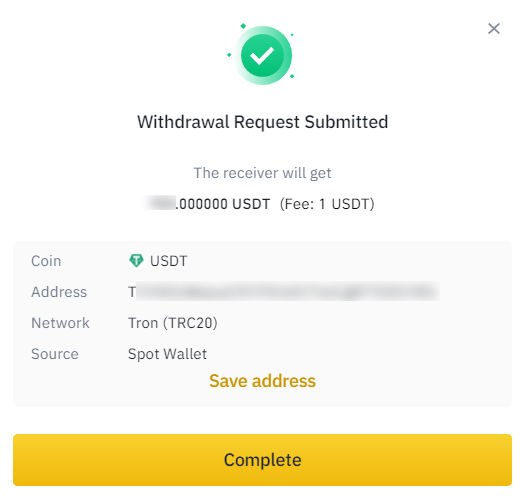
Step 5: Confirm transaction
USDT sent! You can now go to your recipient wallet app and check your USDT balance. If you tap on USDT, you will also be able to see all recent transfers.
Note: Be aware that crypto withdrawals are usually fast, but sometimes it can take up to 10 minutes for the transaction to show up. Make sure you enter the correct address to avoid losing your funds by sending them to the wrong address.
Conclusion
Transferring USDT from Binance to another wallet on Android is a straightforward process both on Binance Lite and Binance Pro.
This process in this article applies equally when transferring other cryptocurrencies between exchanges. The key thing is ensuring both platforms support the specific asset on the same network. This is particularly important for USDT, as it exists on multiple blockchains.
