In this guide, we’ll walk you through the process of ensuring that you can securely accept USDT on Binance with ease on an Android device. From locating your USDT address to confirming the receipt of funds, this guide covers all the necessary actions to make your crypto transactions smooth and worry-free.
Let’s dive in!
Things to note before receiving crypto on the Binance mobile app
Complete KYC Verification: Ensure that your Know Your Customer (KYC) verification is fully completed to enable all features of your account, including receiving cryptocurrencies.
Check for Memo Requirements: Some cryptocurrencies require a Memo or Tag along with the wallet address. Make sure to provide both to the sender if necessary.
Use the Correct Address: Always double-check that you’re using the correct wallet address for the specific cryptocurrency you wish to receive.
Supported Cryptocurrencies: Verify that the cryptocurrency you are receiving is supported by Binance and your account.
Network Selection: When receiving crypto, ensure that the sender uses the correct network that matches the one supported by your Binance wallet to avoid loss of funds.
App Updates: Keep your Binance mobile app updated to the latest version to ensure you have access to all the latest features and security enhancements.
To recieve USDT on Binanace from another wallet using Binance Android Lite
To accept USDT from another wallet in the Android Lite interface, follow the steps below:

Step 1: Find your Binance deposit instructions
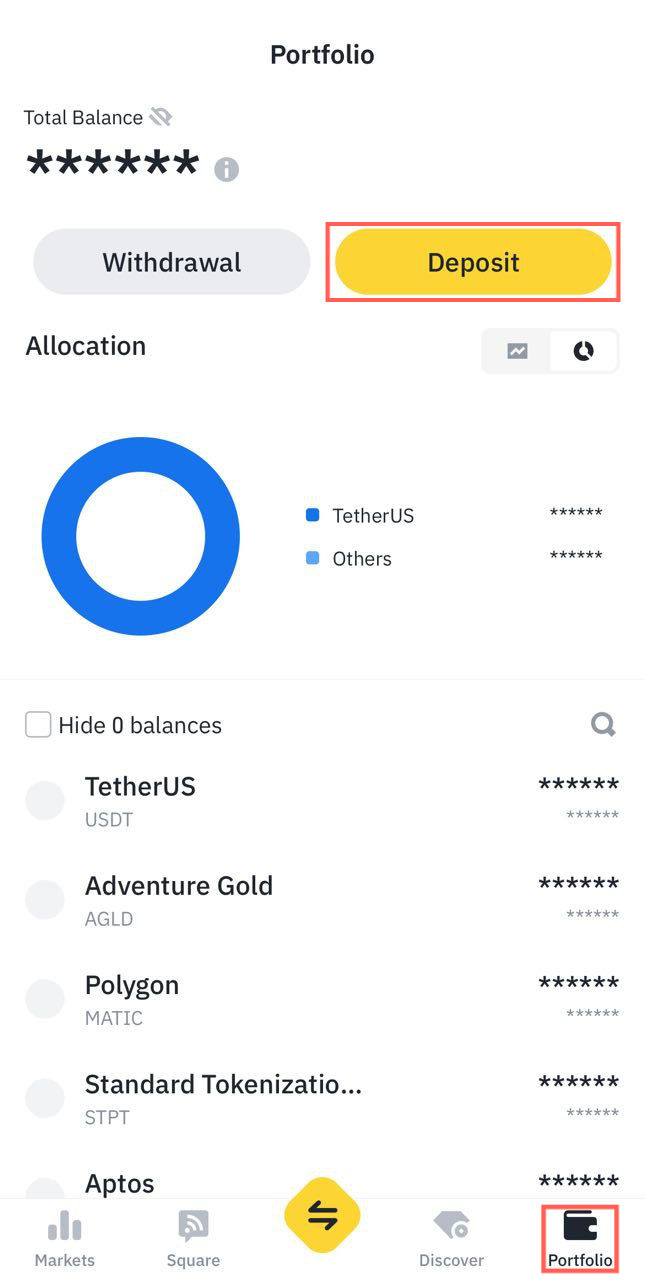
Navigate to the Portfolio tab on the homepage, then tap Deposit.
Step 2: Choose Currency
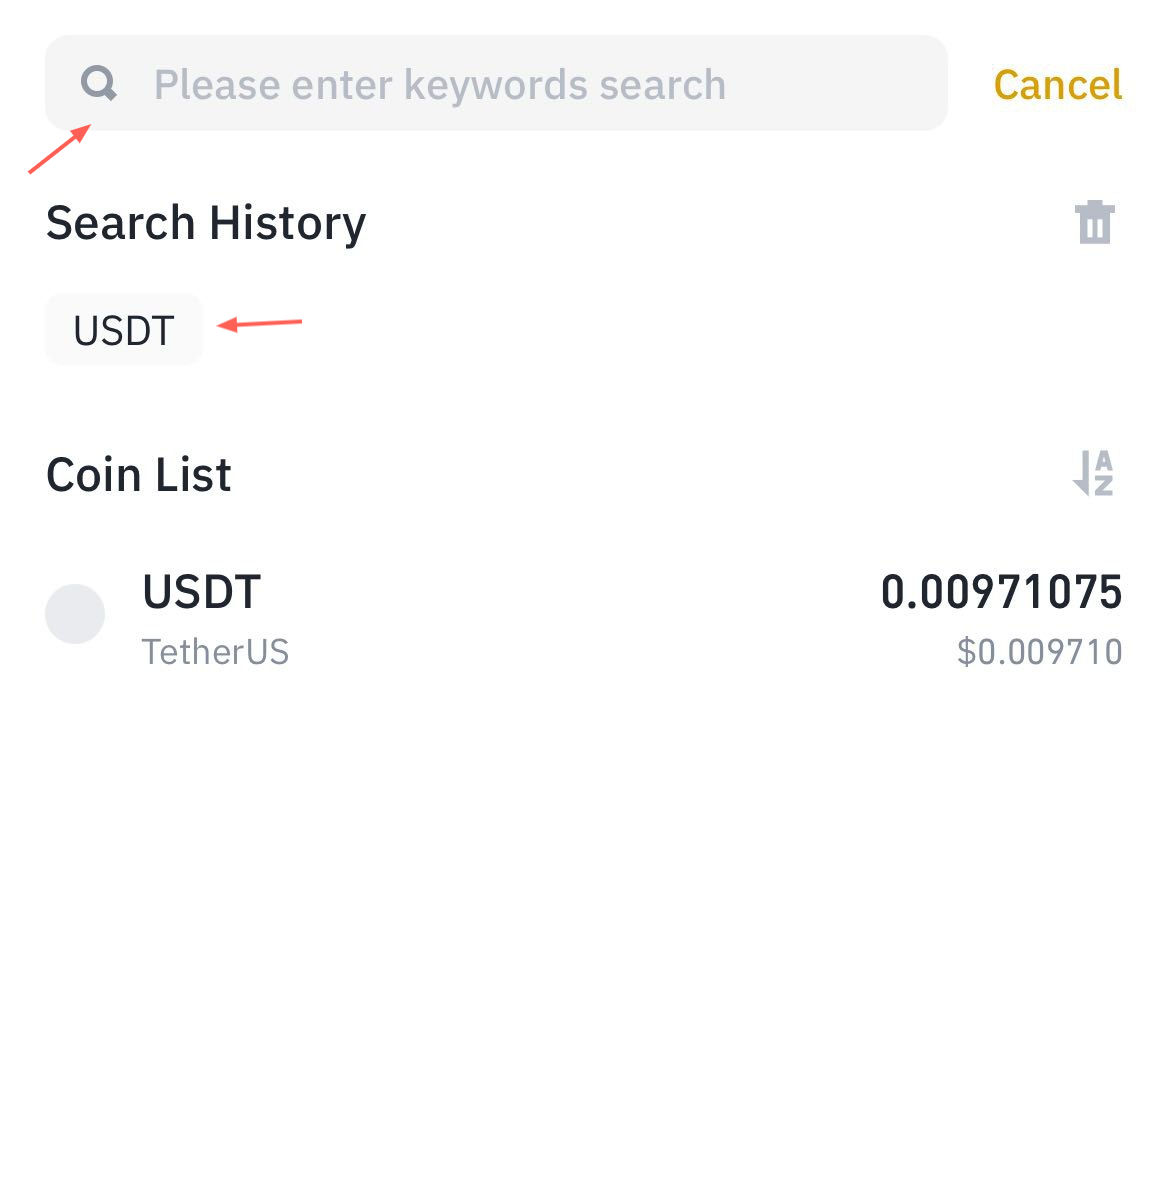
Under the Crypto tab, select USDT from the featured trending coins or search for it by typing.
Step 3: Choose Network
Then, select the appropriate network. This is an important step! Choose the same network that your receiving wallet supports for USDT.

Step 4: Copy Address and Paste in Sending Wallet
Copy the wallet address and switch to the sending wallet to paste.

Step 5: Confirm Transaction
Once complete, verify the USDT balance in your spot wallet. It might take some time for the transfer to be reflected in your wallet, depending on the chosen network.
To receive USDT on Binanace from another wallet using Binance Android Pro
To accept USDT from another wallet in the Android Pro interface, follow the steps below:

Step 1: Find your Binance deposit instructions
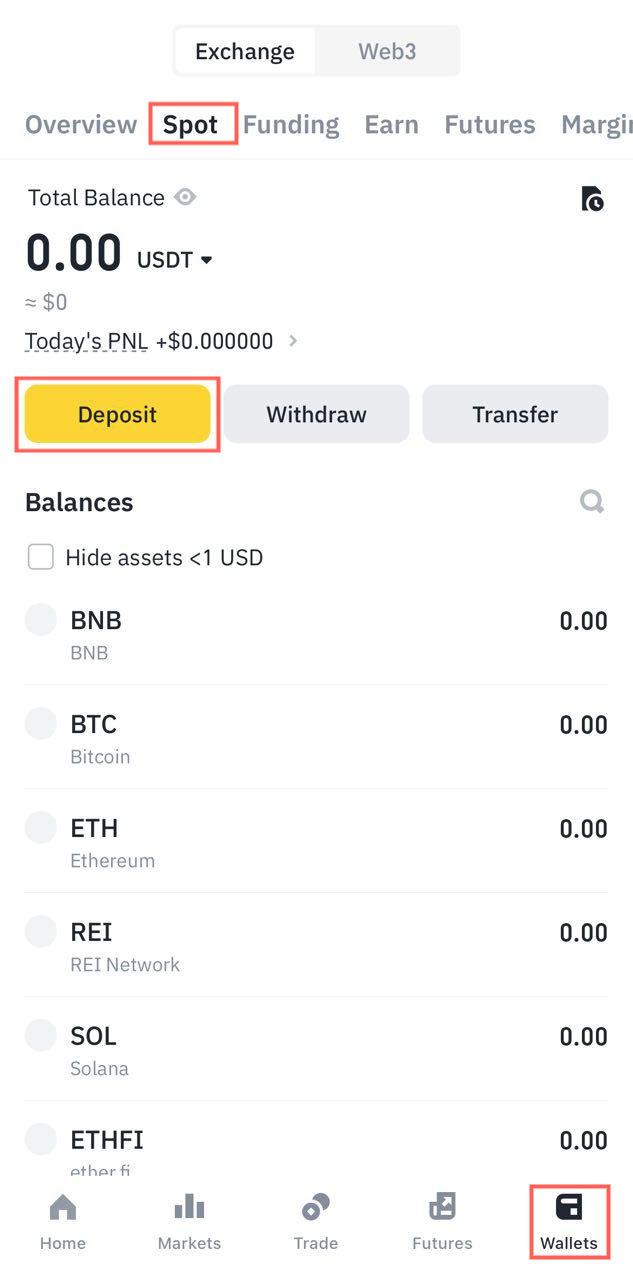
On the Binance homepage, navigate to the Wallets tab and tap Deposit.
Step 2: Choose USDT
Then select USDT from the featured trending coins or search for it by typing.
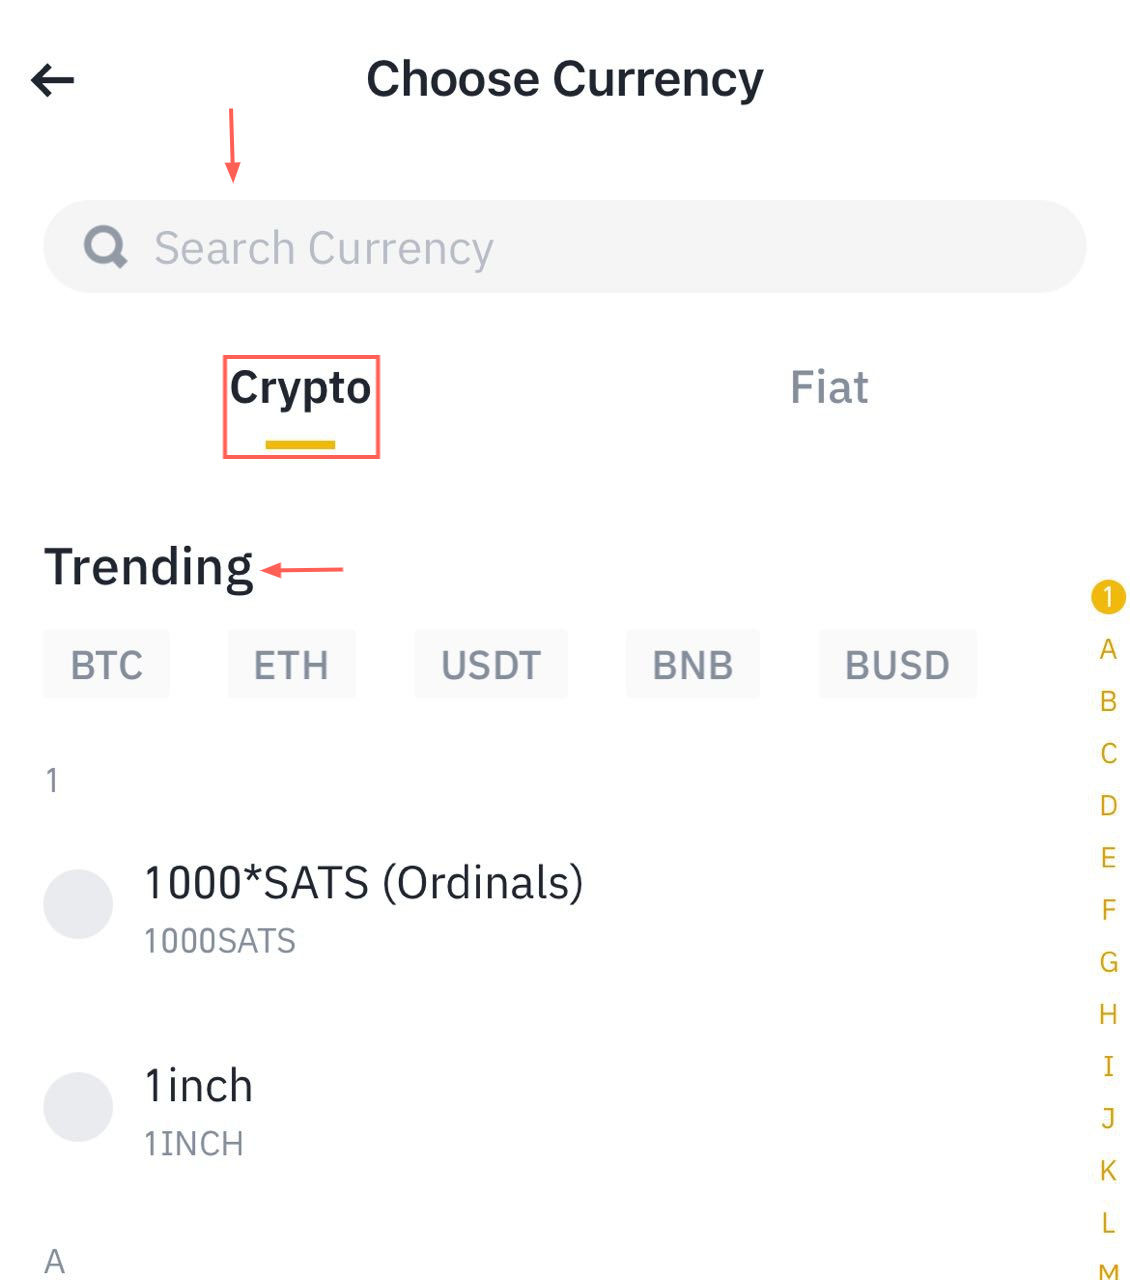
Step 3: Choose Network
Select the same network your receiving wallet supports for USDT. Common options include BEP20, ERC20, etc. Choosing an incompatible network can lead to lost funds.

Step 4: Copy Address and Paste in Sending Wallet
Copy the USDT deposit address from Binance. Then, switch to your sending wallet and paste the address. Double-check the copied address for accuracy.
Alternatively: Some wallets allow scanning a QR code instead of pasting the address.

Step 6: Verify completed transaction
Once you’ve initiated the transfer, check your Binance spot wallet to verify the USDT balance. Depending on the chosen network, it might take some time for the transfer to reflect.
Conclusion
The principles outlined in this guide are not exclusive to USDT or Binance; they are applicable to a wide range of cryptocurrencies and exchanges. The crux of a successful transfer lies in the compatibility of the platforms and the networks they support. This is particularly important for USDT, as it exists on multiple blockchains. By following these guidelines, you can navigate the crypto ecosystem with confidence and ease.
